
Home Production – Import method
This is the way to get started with the least investment in new equipment. First you need a USB microphone. You don’t need to spend a lot of money, but the microphone on your laptop is not good enough for broadcast. These microphones will do the job, although they won’t be as good as the mics we normally use:
If you want better sound quality, you should get a dynamic microphone and a USB audio interface.
You also need to get the Audacity audio editor. It’s available as a free download.
Install Audacity on your computer. It runs on Windows or Mac OS.There is an extensive manual for Audacity that will be able to answer more questions than I can address here.
If you have Mac OS 10.15 or later, you need to run Audacity from Terminal.
If you have Windows or an older Mac you can skip the next section.
For those running Mac OS 10.15 or later: Terminal can be found in the Utilities folder in your Applications folder. Go to Applications -> Utilities -> Terminal. A new window will open in Terminal. At the prompt, enter:
open /Applications/Audacity.app/Contents/MacOS/Audacity
Audacity will now open. Do not close Terminal while Audacity is running.
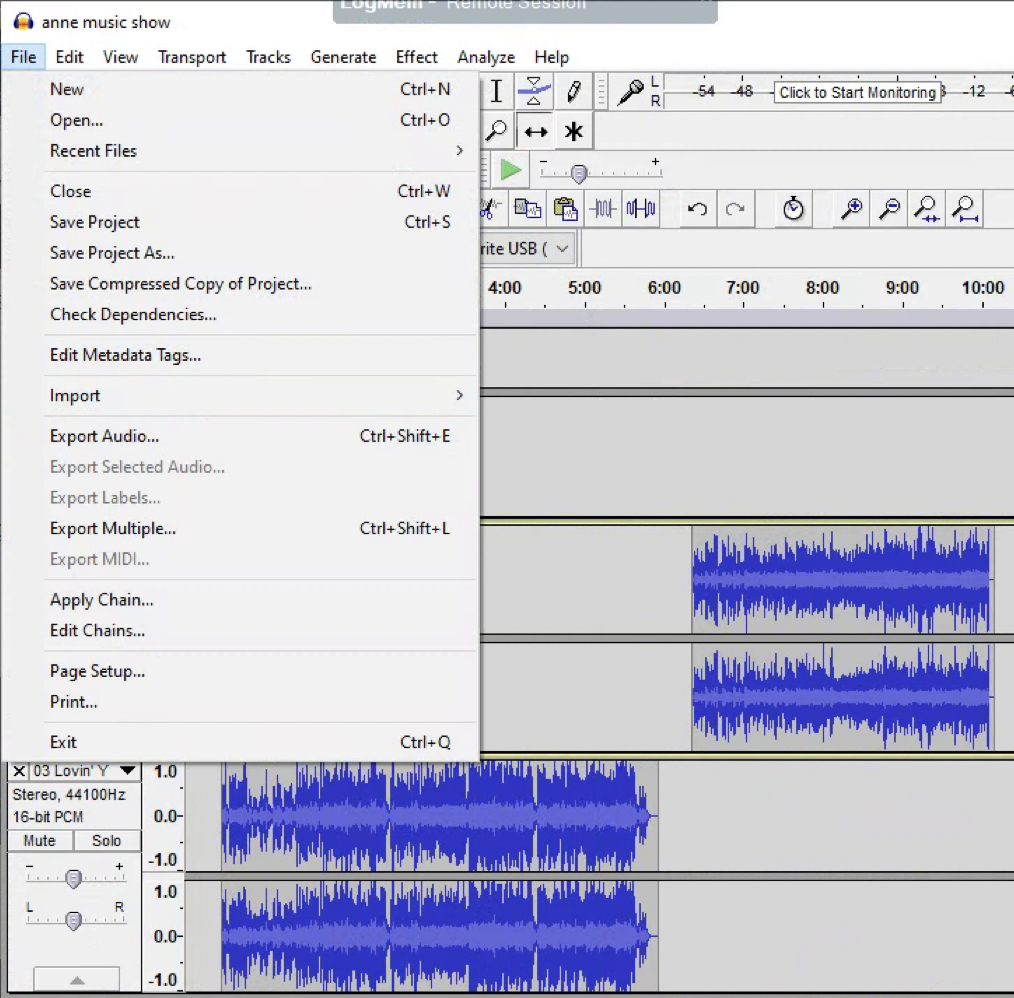
Once you have Audacity open, you need to set the input to receive signal from your microphone. You can do this by using the drop-down menu next to the little microphone icon in the control panel at the top of the window. This is what it looks like on my Mac:
 This is what it looks like on my Windows machine:
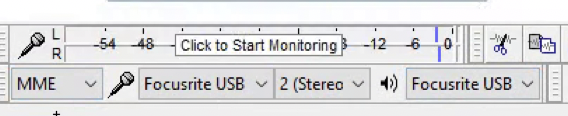 By default, it will be set to “Built-in Microphone” but when you click on the little arrows, you’ll get to choose your USB microphone or your external audio interface. In the screenshot of my Windows machine, the input is set to “Focusrite USB” because I have an external audio interface. More on that on the page for doing a show in live production mode.
Once you have the input set to receive a signal from your microphone, you should be able to record your voice using Audacity. Hit the red record button and you should see the cursor start to move across the screen in Audacity. Speak into your microphone and you should see the wave form appear in the Audacity window. There’s a slider to adjust the volume of your microphone which you can see in the screenshot from the Mac. You probably want to turn that most of the way up. You want the wave form to fill most of the band without touching the edges. In this screen shot, you can see examples of too quiet, about right, and too loud:
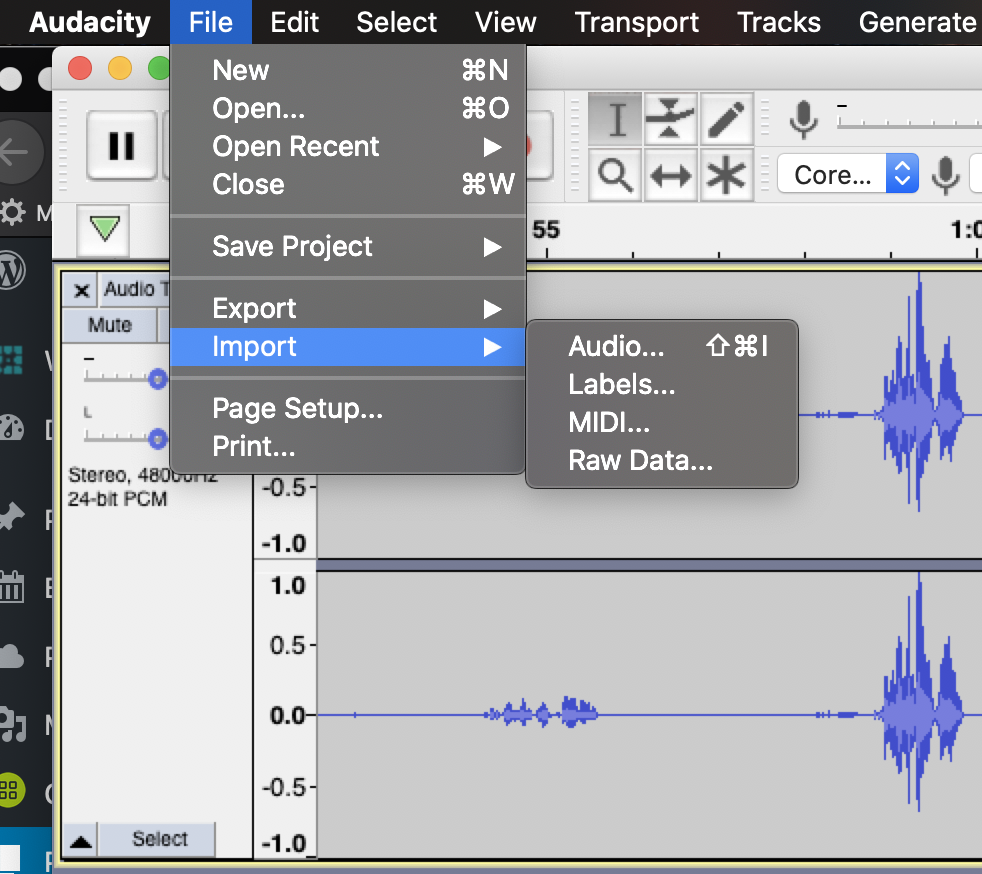
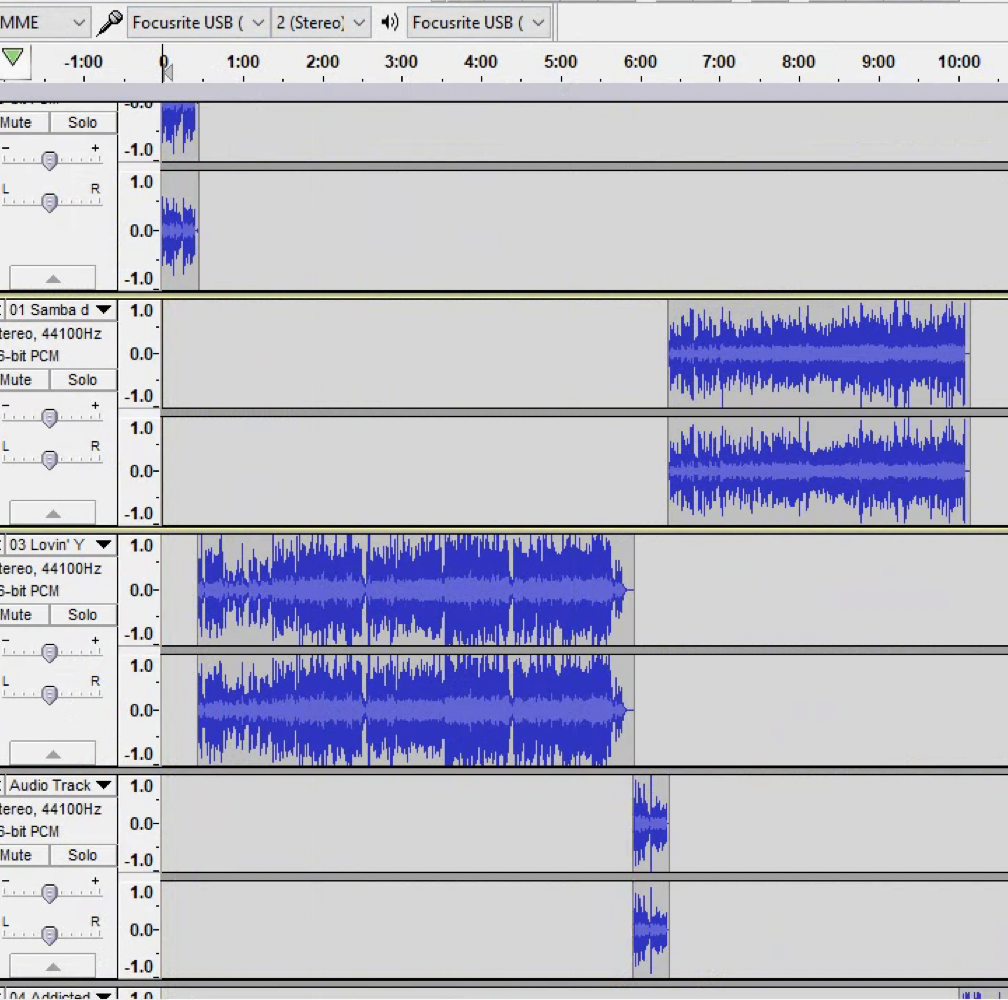
 Once you’ve gotten the microphone working, it’s time to add some music to your show. This works a little differently in Windows and Mac. Running Audacity in Windows, you simply drag and drop mp3s into your Audacity project. If you’re using Mac, you need to go to File -> Import -> Audio and choose your track from a folder:
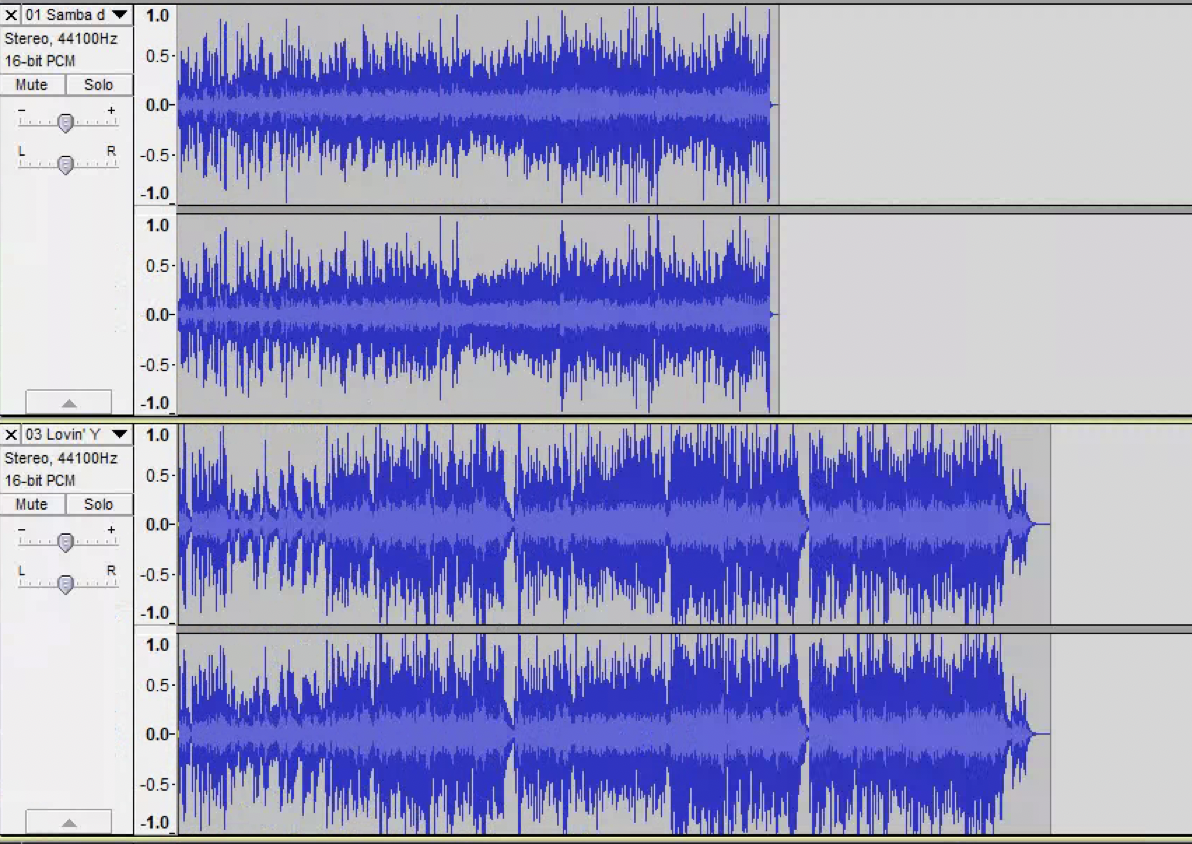
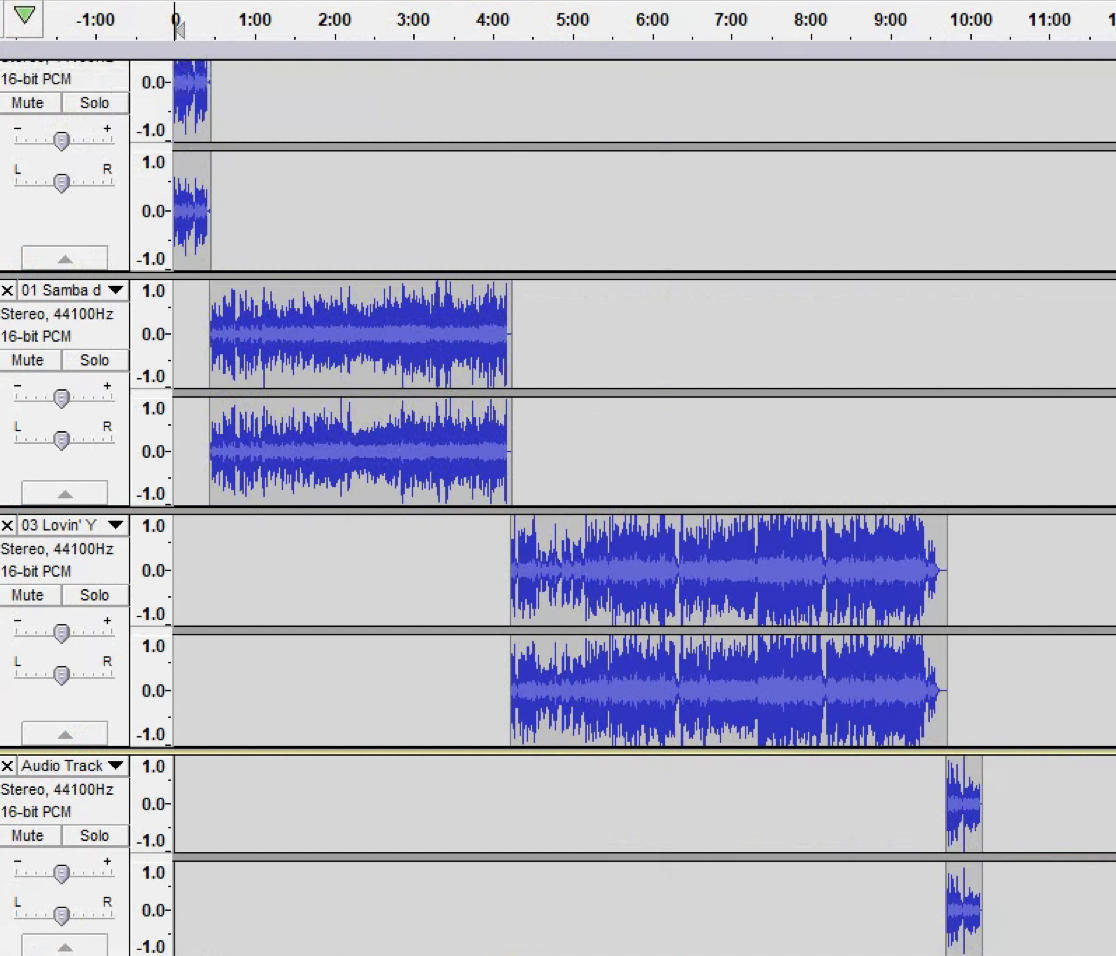
When you import tracks into your project, they will layer on top of one another like this:
 As you add each tune to the project, you need to move them around so that they play end to end. You can move tracks around using the the double headed arrow button in your tool bar:
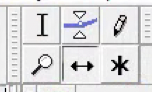 With the “Time Shift Tool” engaged, you can click, hold and drag tracks around the project. Once you get the tracks to play one at a time consecutively, they should look like this:
 Once you have your tracks in the project, you can change their order by moving them around. You can do this by dragging the tracks back and forth where they are so that you get something that looks like this:
 Or you can click on the arrow next to the title of the track to get a drop down menu that will give you the option to move the track up or down in the order:
 After you’ve moved tracks up or down, you need to move them back and forth so they play end to end.
Once you get all of your tracks into the project and get them in the order you want them, it’s time to export the audio.
If you’re using Windows, click on “File” in the top menu bar and choose “Export Audio…”
 You will then get a window that pops up asking you to choose where to put your finished file and what type of file format you want.
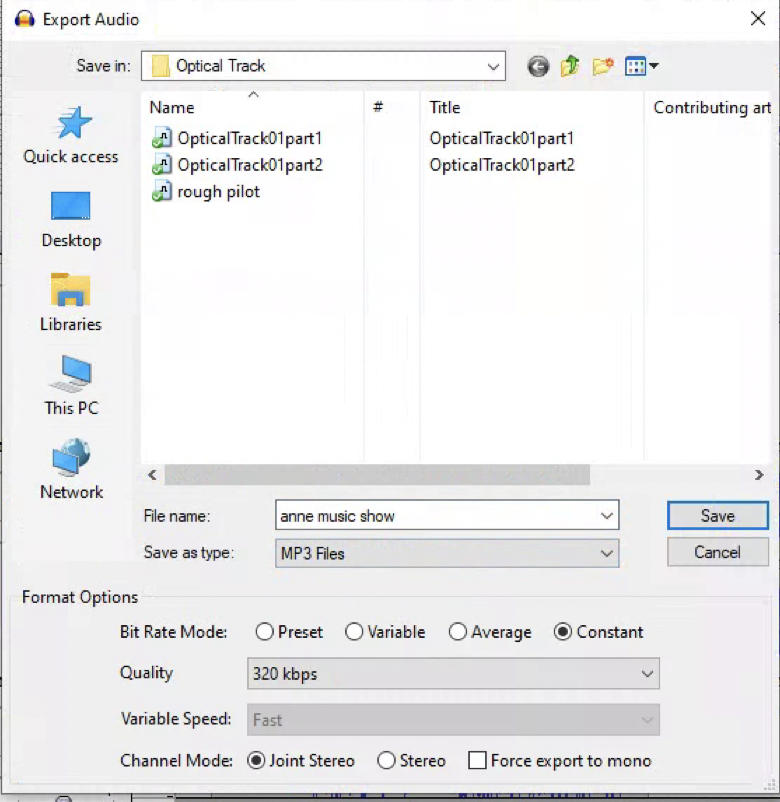 In the drop down menu next to “Save as type”, choose “MP3 Files” In the drop down next to “Quality”, choose 320 kbps. There are other options that will work, but this is a good place to start.
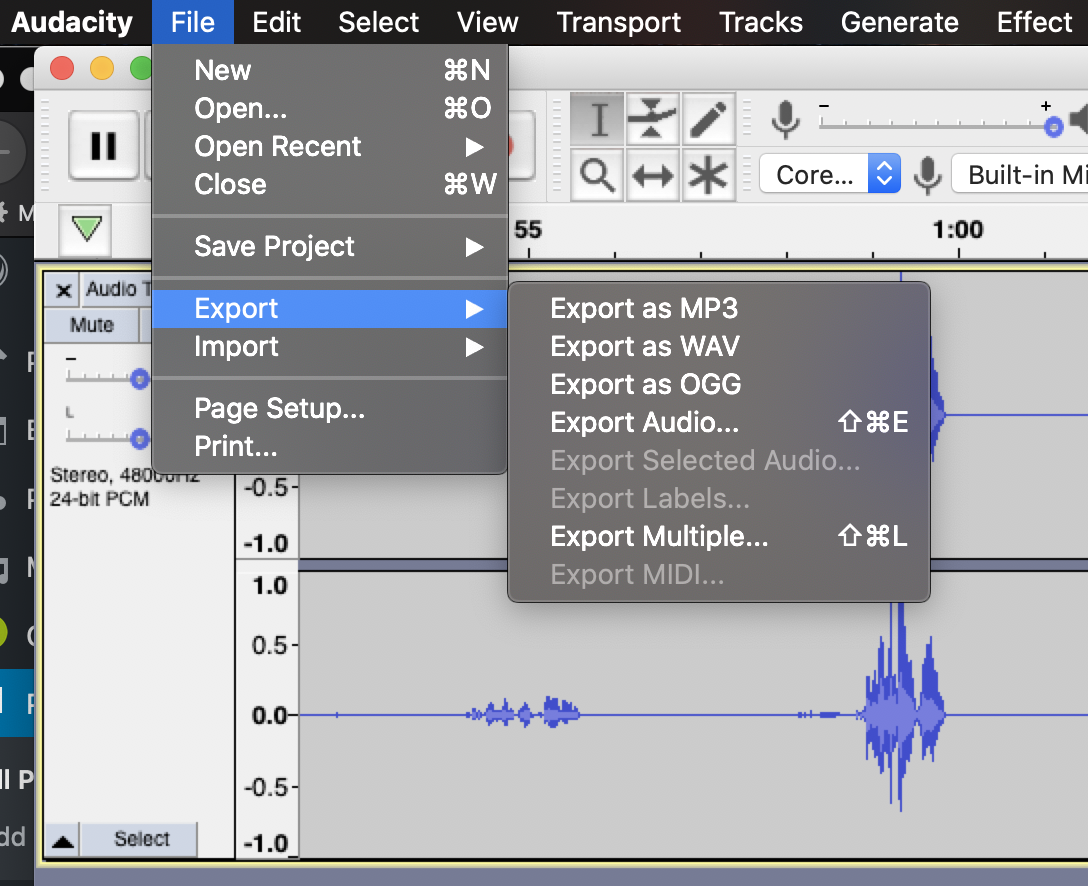
If you’re using Mac, you save your work by clicking on “File” in the top menu bar and choosing “Export” then “Export As MP3”
 You will then see a window asking you where to put the file and what type of file format you want to use:
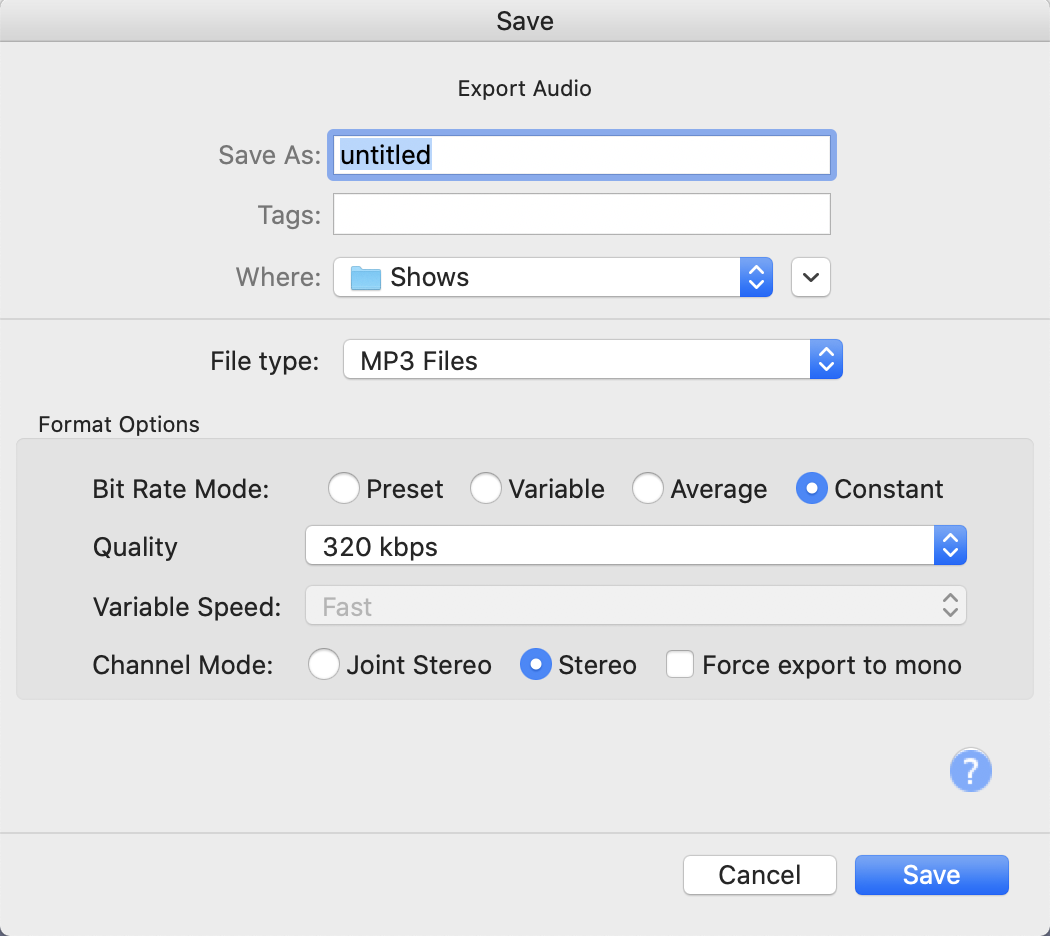 In the drop down next to “File type” you should choose “MP3 Files” In the drop down next to “Quality” you should choose 320 kbps.
The screens you see might very slightly depending on which versions of software you’re running, but the basic settings will apply regardless.
Once you have saved your file, you’ll need to get it to me for broadcast. If you have a Google account, you should use Drive. Upload the file to drive and share it with me. I’ll be able to download it on my end and get it ready for play.
Home Production – Import method
Community Radio For Cape Cod And Beyond
DONATE NOW
LISTEN HERE
Get The App!
Take WOMR wherever you go. Live stream, broadcast archives, upcoming schedule, playlists, events calendar – it’s all in there. It’ll change your life.
![]()

Listen to the broadcast archives. Listen to any show from the last two weeks here.
Be A DJ
New volunteers are always welcome to begin the training process. No experience necessary. Contact Matty matty@womr.org with any questions or to set up an orientation interview. The Program Committee is currently accepting proposals to host one Saturday night per month from 9pm to midnight. Candidates must be trained in the studio. Contact Executive Director John Braden for more information if you or someone you know might be interested.
Get In the Groove

Donate your old records to WOMR or add to your collection with something from our online record store. Call the office or email Matty to arrange donation of your collection. We’ll even come pick them up if necessary.
Donate Your Vehicle
Our partners at CARS will take care of everything for you and send WOMR the proceeds from your donation. Call 866-WOMR-123 or fill out the form on the website to get started today.
We love our
Business Members and Underwriters.


![]()

WOMR Public File
WFMR Public File
Station representative who can assist the disabled with a review of the public file – Chris Boles 508-487-2619
PO Box 975
494 Commercial Street
Provincetown, MA 02657
Tel: 508-487-2619
Fax: 508-487-5524
info@womr.org
Copyright WOMR, All Rights Reserved