
Producing shows at home
Here are the tools you’ll need to get started:
Audacity audio editor. Free download available from https://www.audacityteam.org/download/
There are lots of choices for USB microphones, but you don’t need to spend much money to get started. The basic models will do fine. If you want to get higher quality sound, I recommend that you go straight to the more advanced setup.
The more advanced setup involves an audio interface between your microphone and your computer. This will give you noticeably better sound than the USB microphone. You’ll need a USB cable to connect the interface to your computer and you’ll need an XLR mic cable to connect the mic to the interface.
Whether you go with a USB microphone or a dynamic microphone with an audio interface, you’ll need to import your music tracks into Audacity, record your voiceovers, and edit them to create a radio show. You can drag the tracks around to put them in the order you want them. There’s an extensive Audacity manual to help you with the controls. In this configuration, you’re not doing a show in real time, live-to-tape, but importing and creating all the elements, then editing them together to make a show.
Click here for more detailed instructions on how to create a show at home using the “Import Method”
If you want to do a show ‘live’ like you would in the studio, you’ll need a mixer in addition to a more advanced audio interface. This is the most basic mixer that has the connections necessary to do the show in a more normal way. This is a slightly more advanced mixer that has a few more connections. In this configuration, you connect the interface to your computer via USB, take a stereo line out from the interface to one of the stereo (L/R) channels on the board using ¼” cables. Connect your microphone to channel 1 on the mixer. Then connect the Main Out on the mixer to the line in on the interface using another pair of ¼” cables. Connect your headphones to the Phones jack on the mixer. Open Audacity and make sure that the input is set to receive signal from your audio interface. Turn up the main mix on your mixer and turn up the volume on the channels for your mic and the interface. Now, if you play music from your computer, it will go out to the mixer then back to your computer so you can record it in Audacity. Your mic will also go into the recorder. Hit record on Audacity and you’re good to go. Don’t forget to turn down your mic while the music is playing, otherwise you’ll get room noise in your show.
Once you’ve got your show recorded and edited in Audacity, you can export the file to mp3 or wav file format. The wav format will have better sound quality but the mp3 format will make moving files around a little easier because the files will be smaller. Export the files to a folder on your computer where you’ll be able to find them. If you have Gmail, you can just email the files to me. They’ll be too big to work as attachments, but Google should automatically create a link and upload the files to Drive for transfer. You can also upload the files to Google Drive directly and share them with me that way, or you can use Dropbox or another file transfer service to get me the show.
If you’re new to all of this, it will take some practice and experimentation to get it right. I’m happy to answer questions for folks if you’re interested in finding out more.
Producing shows at home
Community Radio For Cape Cod And Beyond
DONATE NOW
LISTEN HERE
Get The App!
Take WOMR wherever you go. Live stream, broadcast archives, upcoming schedule, playlists, events calendar – it’s all in there. It’ll change your life.
![]()

Listen to the broadcast archives. Listen to any show from the last two weeks here.
Be A DJ
New volunteers are always welcome to begin the training process. No experience necessary. Contact Matty matty@womr.org with any questions or to set up an orientation interview. The Program Committee is currently accepting proposals to host one Saturday night per month from 9pm to midnight. Candidates must be trained in the studio. Contact Executive Director John Braden for more information if you or someone you know might be interested.
Get In the Groove
Donate your old records to WOMR or add to your collection with something from our online record store. Call the office or email Matty to arrange donation of your collection. We’ll even come pick them up if necessary.
Donate Your Vehicle
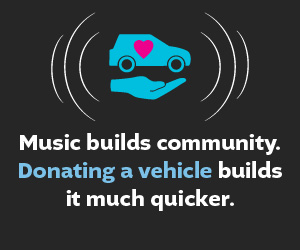
Our partners at CARS will take care of everything for you and send WOMR the proceeds from your donation. Call 866-WOMR-123 or fill out the form on the website to get started today.
We love our
Business Members and Underwriters.


![]()

WOMR Public File
WFMR Public File
Station representative who can assist the disabled with a review of the public file – Chris Boles 508-487-2619
PO Box 975
494 Commercial Street
Provincetown, MA 02657
Tel: 508-487-2619
Fax: 508-487-5524
info@womr.org
Copyright WOMR, All Rights Reserved